
I've thought this for a while, but the last week of exploring Taipei has made me sure: the panorama option is a really underrated iOS camera feature.
- Square: How stupid, just crop the image later.
- Video: Very convenient, but so far all I've done is accumulate some shaky footage.
- Slo-Mo: Still no easy way to export to Instagram or Facebook.
- Filters: The native iOS options are decent but I still prefer Instagram, or even VSCO's advanced options.
- HDR: fun to play with at first but the difference between regular and HDR is pretty minimal, and I often prefer the non-HDR version.
I've had a lot of fun taking super wide-angle shot with it since panorama was included in iOS 6 (fall of 2012). Before it became part of iOS, I'd tried a few specialized camera apps, but they always ended up looking funny, and I found one desktop tool called Hugin for stitching pictures together on the computer, but it wasn't that easy to use. I did use it to create a beautiful photo view from the top of the US Bank building in San Francisco.
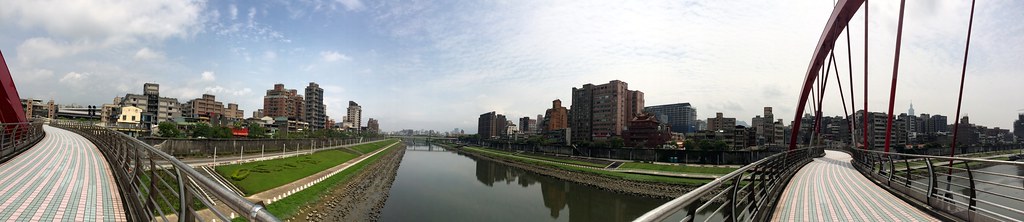
I admit, I've got a thing for views, whether from the top of a hill or a tall building, or even just a big open space. Particularly when I'm traveling or visiting touristy sites, taking a picture of up to 240 degrees helps capture the experience of being there.Here's a photo I took recently on the Rainbow Bridge above Keelung River:
Exposure
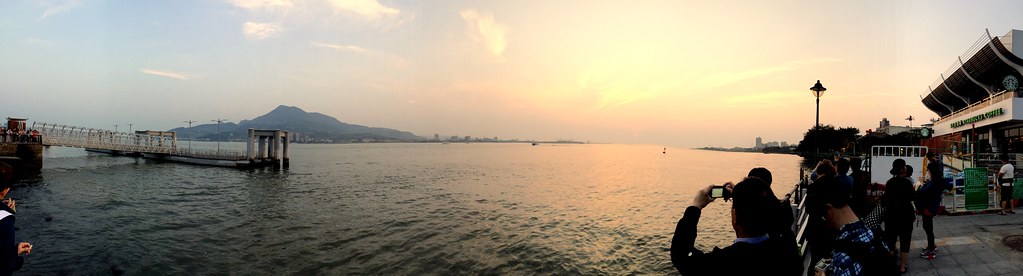
What I didn't realize until recently is that the panorama has improved a lot in iOS 7. I think it's gotten way better in using dynamic exposures so that if I'm taking a panoramic shot of something bright and something darker, it adjusts automatically, which helps with sunsets like this one a few nights ago in Tamsui:
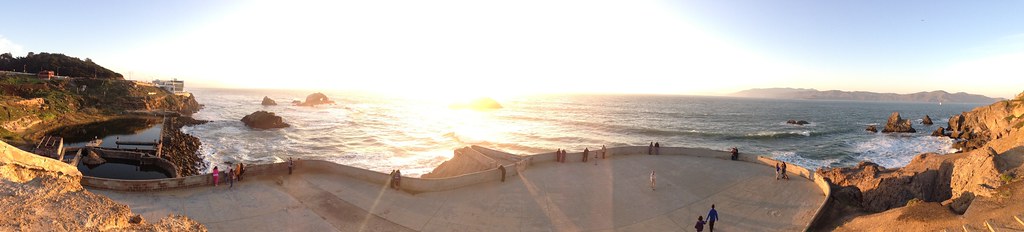
Compare it to this one where the sun was a bit too much at Sutro Baths:
Alignment
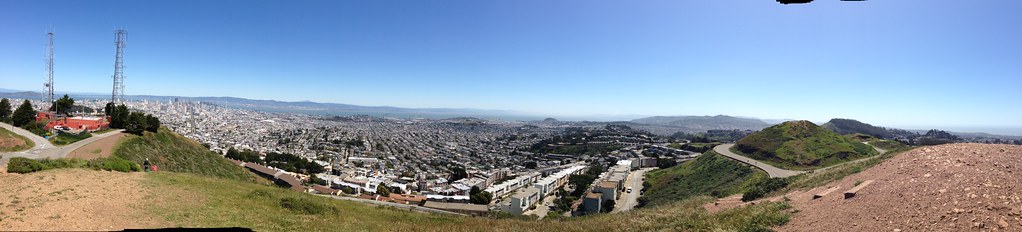
I think I'm getting better at shooting with a steady hand / body twist, but I've also noticed fewer problems lately with misalignment, which results in black bars along the top or bottom of the image. You can see those streaks in this picture on the top of Twin Peaks in San Francisco, taken almost exactly a year ago (might have to click through to Flickr to see the full image):
Vertical
The other day I saw someone had taken a vertical panorama, meaning they moved the phone up and down instead of from side to side. This blew my mind (I am not much of a lateral thinker). I thought we were stuck taking pictures only in the horizontal format. So I tried it out a few days ago when I went to visit Taipei 101, thinking it'd be a great subject to capture in all of its vertical grandeur. I ended up cropping down to a square anyway.

- I didn't get close enough to the building for the impact of a vertical panorama to really be interesting.
- I held the phone too close to myself. Basically started out with it in front of my chest and moved it upwards. That meant, to capture the sky above and behind me, I found myself contorted into a backbend, which I haven't since my last failed attempt at a Yoga class around 10 years ago. There are obviously less gymnastic ways of accomplishing this by just holding out your arms and moving them. I'll give that a try next time :)
I know there are some other cool tricks you can do, like having someone run from one part of the panorama to another to appear multiple times. I haven't tried anything like that yet though -- any suggestions?